menu.png

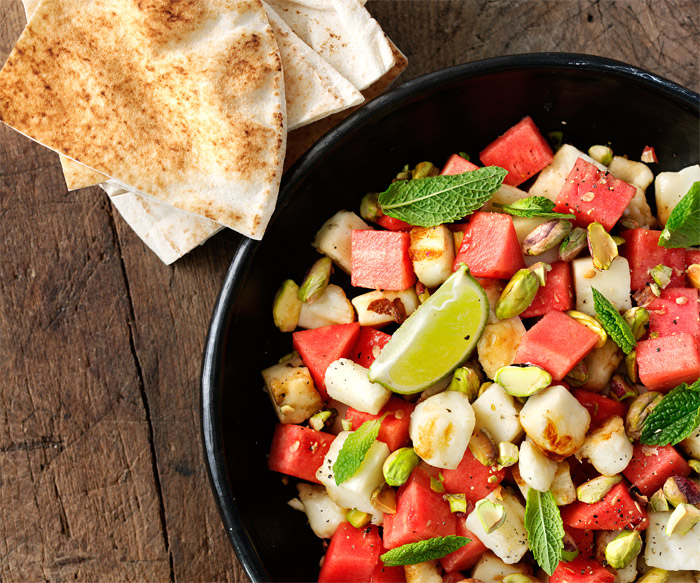
Griddled Halloumi, Pistachio and Watermelon Salad – ready in 10 minutes!

griddled-halloumi-salad-ready-in-10-minutes
 
It’s hard to imagine getting dinner for 4 ready in less than 10 minutes. But with Liz Franklin’s book Express Meals you can put together and amazing array of flavoursome, fresh meals in no time at all.

Take this Griddled Halloumi, Pistachio and Watermelon Salad for example. It’s quick, filling and delicious, especially with some warmed pitta breads on the side. And you have to admit, much better than a ready meal…
 

Griddled Halloumi, Pistachio and Watermelon Salad

The salty-sweet/crunchy-soft combination of griddled halloumi, watermelon and pistachios is absolutely stunning. Plenty of freshly ground black pepper is a must.

½ small watermelon, deseeded and cut into bite-sized chunks
2 handfuls of unsalted shelled pistachios
500g/1lb 2oz halloumi cheese, patted dry and diced
juice of ½–1 lime
1 small handful of mint leaves
freshly ground black pepper

TO SERVE: lime wedges, pitta breads and crisp green salad

1. Put the watermelon on a large platter, then scatter over the pistachios.

2. Heat a large griddle pan over a high heat. Griddle the halloumi for 2 minutes, turning often, until golden on all sides. Scatter the halloumi over the watermelon and add a squeeze of lime juice, to taste.

3. Top with the mint leaves and season with pepper. Serve, while the cheese is still warm, with lime wedges, pitta breads and a crisp green salad.


175 delicious dishes you can make in 30 minutes or lessWho’d have thought that in less than thirty minutes it’s possible to roast red mullet and serve it with a chilli and garlic vinaigrette, bake a cherry tomato clafoutis, or rustle up a thai chicken curry? These are dishes that are sure to be popular family meals, yet will also go down well at any dinner party.

You can find them all in Express Meals, with full-meal recipes that take just five, ten, fifteen, twenty, twenty-five and thirty minutes to make.
Order Express Meals to takeaway with free postage in the UK 


A Cheap Seafood Linguine en Papillote, to help you through to payday

seafood-linguine-en-papillote
 
Overspent at Easter? Fear not – here’s a delicious and healthy recipe from The Top 100 Cheap Eats from Hilaire Walden that will help you get through to payday.

‘Many varieties of fish have become expensive, but that does not mean you have to eliminate fish from your diet. Instead of going for the well-known varieties such as cod and haddock, look for cheaper types such as coley, pollock and huss (don’t be put off by the slightly greyish colour of the first two, as they become white when cooked). You can save even more money by buying frozen fish rather than fresh – it’s still nutritious and you can use as much as you want when you want, rather than worrying about it going off.

Another money-saving tip for buying fish: make the most of any bargains you come across. If you see a side of salmon at a reduced price, for example, you can cut it up and freeze it. And unless you want perfect slices of smoked salmon, buy smoked salmon trimmings, which are a fraction of the price and perfect for pasta dishes.’

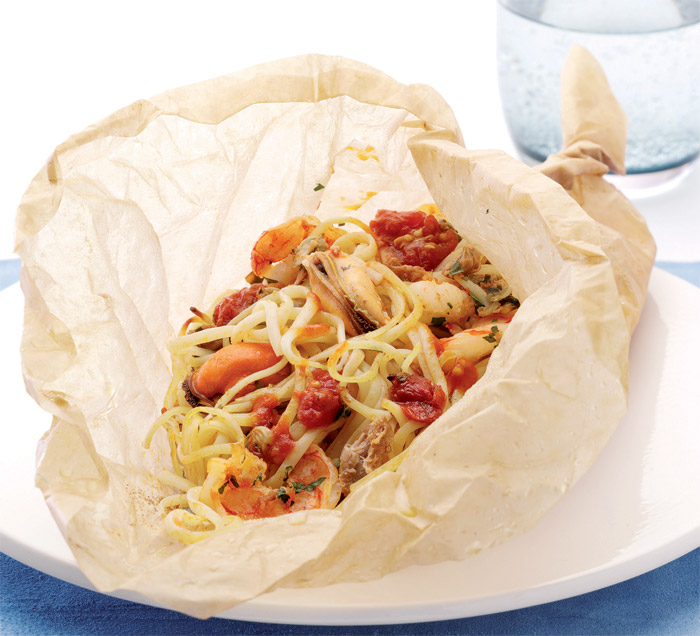
This Seafood Linguine en Papillote uses frozen mixed seafood to help keep costs down, it’s ludicrously easy to make, serves 6, and (most importantly) it tastes great too! Perfect for an end-of-the-month meal.


Seafood Linguine en Papillote

Serves 4–6
Preparation time: 5 minutes
Cooking time: 30–35 minutes

500g/1lb 2oz linguine
olive oil, for frying
2 garlic cloves, crushed
400g/14oz/1⅔ cups tinned tomatoes
2 tbsp sun-dried tomato paste
700g/1lb 9oz frozen mixed seafood, thawed
1½–2 tbsp capers
leaves from a small bunch of flat-leaf parsley, chopped
salt and freshly ground black pepper


1 Preheat the oven to 190ºC/375ºF/Gas 5. Lightly oil 4 or 6 pieces of greaseproof paper, each 35-cm/14-in square.

2 Cook the linguine in a large saucepan of boiling water following the packet instructions, but for 1 minute less than the suggested time.

3 Meanwhile, heat a little oil in a saucepan and fry the garlic over a low heat for 1 minute. Stir
in the tomatoes, tomato paste and seasoning, increase the heat and bring to the boil, then reduce the heat and simmer, uncovered, for 5 minutes.

4 Drain the pasta and toss it and the seafood, capers and parsley with the tomato sauce.

5 Place one portion in the centre of each piece of greaseproof paper. Fold the edges loosely over the pasta mixture and twist the edges together to seal tightly. Place on a baking sheet and cook in the preheated oven for 20–25 minutes until hot throughout.


How to Memorize a Deck of Playing Cards

dominic o'brien reveals how to memorize a deck of playing cards
 
Eight-times World Memory Champion Dominic O’Brien shows you how easy it is to memorize a deck of playing cards. In fact, during a Guinness World Record attempt in 2002 he used this technique to memorize 2808 random playing cards from 54 packs after seeing each card only once! Now, that would take some serious practice, but if you use Dominic’s memory technique below, you’ll have an ace party trick up your sleeve.

‘My inspiration for taking up memory training came from watching international memory master Creighton Carvello on television memorizing a deck of shuffled playing cards in the incredibly fast time of two minutes and fifty-nine seconds. The cards were dealt our one at a time, one on top of the other: in other words, he had just a single sighting of each card. How, then, was it possible for this man to link 52 unconnected pieces of data together in less than three minutes? It was this question that inspired me to take up a deck of cards and try to fathom the answer for myself.

It soon dawned on me that what i needed to do was visualize each of the 52 cards as a particular person. I could then use a memory technique called the ‘Journey Method’ to preserve the order of the cards.

After three months of intense training, not only could I memorize a whole deck in less than three minutes, but I was now memorizing multiple decks of cards. With this simple and fun technique, it is possible to memorize multiple decks. But for now, here is how you too can memorize a single deck of cards.


How to Memorize a Deck of Cards

Number Cards

You must first assign a person to every card between Ace and 10. We’ll deal with the court cards later. Cards can be treated like numbers. The easiest way to assign a person to each card is to translate them into pairs of letters which then represent the initials of names (know as the Dominic System). The number of the card gives you the first letter. So, taking to be Ace conveniently gives us the letter A2 becomes B, 3 becomes C and so on. To make things simpler, the 10 becomes O. The suit provides you with the second letter:

♣ Clubs = C

♦ Diamonds = D

♥ Hearts = H

♠ Spades = S

In a notebook, list the 10 cards from 1 (Ace) to 0 (10) in a column. Make for more columns for the suits: Clubs, Diamonds, Hearts and Spades. Fill in all the columns by converting each card into a pair of initials. For example, the Ace of Clubs becomes the initials AC; the of Diamonds becomes ED; the 8 of Hearts becomes HH; and the 10 of Spades becomes OS.

Now fill in the columns using prominent people whose name matches up to the initials of the cards. So, the Ace of Clubs is Al Capone (1= A; Clubs=C); the 5 of Diamonds is Eliza Doolittle (5=E; Diamonds = D); the 8 of Hearts is Hulk Hogan (= H; Hearts = H); and the 10 of Spades is Oliver Stone (10 = O; Spades = S).

It’s best to go with the first name that pops into your head when you read the initials. That instant reaction suggests you’ll be able to remember the person better. Imagine them with props or doing something that reminds you of them – for example, Oliver Stone could be using a film camera, or Hulk Hogan could be lifting weights. Have fun with it!


Face Cards

Now we need to deal with the court, or face, cards. Start by looking at the faces of each card: if their faces resemble any people you know, use that particular person to represent the card. If not, then you need to decide on a character for them. Here are some examples below, based on the associations I make with each suit: Clubs make me think aggression or golf; Diamonds represent actual diamonds and wealth; Hearts remind me of romantic leads in movies; and Spades (which resemble inverted hearts) represent villians. Make sure each character has their own action or prop.

For example:

Marilyn Monroe, dripping with diamonds, to represent the Queen of Diamonds

Draco Malfoy, mixing a potion, to represent the Jack of Spades

or Mohammed Ali, wearing boxing gloves, to represent the King of Clubs
 

Now, let’s put these techniques into practice.

Exercise 1: Warm Up

Once you can identify each card as a person, you are ready to start memorizing your first deck of cards. However, I suggest you attempt 10 cards as a warm-up before tackling the whole sequence of 52.

1) Form a mental journey consisting of 10 stages.

2) Deal out 10 playing cards and convert each card into its character. Imagine seeing each character posted along each stage of your journey, performing his or her own actions. If the King of Diamonds is your first card, Bill Gates is counting diamonds at the first stage of the journey, and so on.

3) Replay your journey and jot down the order of the cards in your notebook.

Score 10 points for each correctly remembered card before a mistake is made. 

Maximum points: 100        Untrained: 20+   Improver: 40+   Master: 90+

Exercise 2: Whole Deck

If you feel ready, you can now try to memorize your first deck of cards. Follow the instructions given in the exercise above, only this time you will need to plan a journey of 52 significant stops and deal out the whole deck of cards. You can monitor your progress by timing yourself. Over the next four weeks aim to memorize a deck in less than 15 minutes. Eventually, with practice, you should be able to break the five-minute barrier!’

Simple, isn’t it?


Do you want a brilliant memory?

Dominic’s book, How to Develop a Brilliant Memory, Week by Week, shows you how to power-up your natural memory gifts, and remember everything from names and faces, recalling jokes and speeches exactly when you need to, and working up to the truly impressive feat of memorizing a dictionary!


8 foods to avoid during cancer treatment

foods-to-avoid-during-cancer-treatment
 
Knowing what not to eat during cancer treatment is a very important part of living with cancer. As part of Bowel Cancer Awareness month, experts from Penny Brohn Cancer Care reveal 8 foods that can have a negative impact on your ability to fight cancer.

They’ve outlined foods you should only eat in moderate amounts, and those you should try your best to avoid.
 

Foods to eat in moderate amounts during cancer treatment

1. Red Meat – Important nutrients including B vitamins and minerals (especially iron) are found in red meat. There is evidence that too much red meat can increase the risk of certain cancers, but there is no health risk associated with eating a moderate amount of unprocessed red meat.

We recommend only eating small portions of red meat – approximately the amount that would fit into the palm of your hand. Choose organic or grass-fed meat, if you can, as the nutrient quality is much higher.
 
2. Dairy Products – Containing a range of vitamins and minerals, dairy products are a good source of protein and healthy fats. Nevertheless, some researchers have questioned whether they are suitable for people with cancer, especially hormone-sensitive cancers. The research shows dairy to be a risk factor in prostate cancer, although there has been little research examining the effects of dairy produce on the health of cancer survivors. Some people find that, after anti-cancer treatment, dairy foods upset their digestion.

We recommend, for people with prostate cancer and those who find milk products difficult to digest, that you keep the amount of dairy products you eat to a minimum. For others, organic and full-fat yogurt and butter can be used, with minimal amounts of milk and cheese. You may find goat’s or sheep’s products easier to digest.
 
3. Soya Products – Foods made with soya beans are an important part of traditional Asian diets (for example, in the form of tofu, miso or tempeh) but they are a relatively new addition to the Western diet. Like some other plant foods, they contain phytoestrogens; however, soya also contains less favourable compounds, often termed “anti-nutrients”, that can interfere with nutrient absorption.

We recommend that if you eat soya, choose organic types such as tofu, miso, tempeh and natto, which tend to have lower levels of these anti-nutrients.
 

Foods to avoid during cancer treatment

These foods have little or no health benefits and are best eaten rarely or avoided.
 
4. Refined grains and sugars – Products made with refined grains, such as white flour and white rice, lose a lot of their natural nutritional value, including fibre, in the refining process. Eating these refined carbohydrates leads to a rapid rise in blood sugar and encourages unhealthy changes in your body.

We recommend avoiding refined grains and sugary foods as much as possible. Vegetables and fresh or dried fruit are full of natural sweetness and can be used to make healthy puddings, cakes and biscuits.
 
5. Unhealthy/Damaged Fats – Fats that have been damaged due to heavy processing are particularly bad for you. Trans-fats are an example. These are mainly found in partially hydrogenated vegetable oils, which are used in commercial crisps, mayonnaise, cakes, biscuits, pastries and deep-fried foods.

We recommend avoiding processed, fatty foods. Instead, prepare cakes, biscuits and pastry products at home using butter or oils such as olive and coconut. Don’t heat oils to high temperatures during cooking, as this can cause oxidation and damage the fats, although coconut and rapeseed oils are more stable at higher temperatures.
 
6. Processed Meats – There is evidence to suggest that a high intake of processed meats increases the risk of developing some cancers. Processed meats include heavily processed burgers and sausages, salami, bacon and other smoked or cured meats.

We recommend minimizing the amount of processed meat you eat. If you have it occasionally, choose organic products if possible.
 
7. Barbecued, Grilled and Griddled Foods – There is evidence that eating lots of barbecued, grilled or griddled foods may increase the risk of certain cancers; however, there is no harm in having these occasionally.

We recommend that when you cook foods in these ways, in particular meat, don’t allow them to come into direct contact with a naked flame and try not to allow them
to over-brown or burn.
 
8. Salt – If processed food forms a large part of your diet, you will most likely be eating too much salt, which can upset the delicate balance of minerals in the body. Whole foods and fresh, unprocessed foods are naturally low in salt. You can use a little good-quality rock or sea salt in cooking to enhance flavour. Also use herbs, spices, garlic, onions, dried mushrooms, dried tomatoes and lemon juice to further enhance flavour. Seaweed can also add flavour and is a valuable source of iodine, which is often deficient in the modern diet.
 
If you or someone you know has cancer, you need all the information about the relationship between diet and cancer that you can get. Take a look at the advice given by Penny Brohn Cancer Care on the real change the food you eat can have on cancer, and the best foods for fighting cancer.

The information for our Bowel Cancer Awareness blogs is drawn from Nourish: The Cancer Care Book which was written in partnership with Penny Brohn Cancer Care.


Make home-made ricotta (and use it for these apple and honey tarts)

home-made ricotta served with apple and honey tarts
by Emma MacDonald

Making ricotta is not as challenging as it sounds and this version of the Italian soft cheese is wonderfully rich, creamy and indulgent. The taste will depend on the quality of the milk and the cream that you use – the best-quality dairy produce will obviously result in a ricotta with a superior flavour and texture.

It doesn’t take long to make and, once it’s ready, add some vanilla and create some sweet vanilla ricotta cream. Then you can spoon it alongside some delicious Apple and Honey Tarts.
 

Easy home-made ricotta recipe

Makes: 400g/14oz/generous 1½ cups

Preparation time: 10 minutes

Cooking time: 15 minutes
 
875ml/30fl oz/3½ cups whole milk
125ml/4fl oz/½ cup double cream
½ tsp salt
3 tbsp lemon juice
 
Heat the milk, cream and salt in a large stainless steel saucepan until it reaches 88°C/190°F. Stir the mixture occasionally to prevent it catching on the bottom of the pan.

Remove the pan from the heat and add the lemon juice, then stir gently and slowly a few times and leave the pan to stand for 5 minutes. The milk mixture should start to curdle and separate almost immediately.

Line a sieve with a large square of muslin, folded into three layers, and set it over a bowl. Pour in the milk mixture and leave to stand for at least 1 hour. After 1 hour, you should have a spreadable cheese and after 2 hours, the ricotta will have the texture of soft cream cheese.

Discard the whey in the bowl and transfer the ricotta to a bowl if eating straight away.

Alternatively, transfer it to an airtight container and keep in the fridge until ready to use.

Apple & Honey Tarts with Ricotta

Makes: 12

Preparation time: 30 minutes, plus chilling

Cooking time: 30 minutes

Nothing beats the classic combination of honey-glazed apples and buttery shortcrust pastry ­– unless, of course, it’s served with a sweet vanilla ricotta cream!
 
½ recipe quantity Ricotta
1 tsp vanilla extract
75g/2½oz/scant ¹∕³ cup caster sugar
2 eggs, separated
2 small, firm tart apples, peeled, cored and thinly sliced crossways
2 tbsp clear honey
 
Pastry:

200g/7oz/scant 1²∕³ cups plain flour, plus extra for dusting
a pinch of salt
1 tsp caster sugar
125g/4½oz cold unsalted butter, cubed, plus extra for greasing
 
Sift the flour and salt into a mixing bowl, then stir in the sugar. Rub in the butter with your fingertips until the mixture resembles coarse breadcrumbs. Drizzle in up to 2 tablespoons water, stirring with a fork and then your hands to bring the pastry together into a ball. Wrap in cling film and chill for at least 30 minutes.

Preheat the oven to 190°C/375°F/Gas 5. Lightly grease 12 holes of a non-stick deep muffin tin. Roll out the pastry on a lightly floured work surface, then cut out 12 x 10cm/4in rounds. Line the holes of the muffin tin with the pastry so that it reaches just above the edge of each one. Chill until ready to fill the tarts.

Mix together the ricotta, vanilla, sugar and egg yolks in a bowl until smooth and creamy. Whisk the egg whites until they form firm peaks. Gradually fold the egg whites into the ricotta mixture. Spoon 2 heaped tablespoons into each tart case and top with 3–4 apple slices. Bake for 30 minutes until the pastry is light golden, the filling has risen and the apples are tender. Remove and cool for 10 minutes. Prise the tarts out of the tin and put them on a wire rack. Melt the honey in a pan, then brush it over the apples. Serve warm.


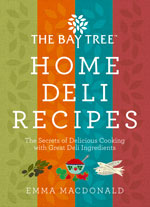
Having grown up on the family’s delicious, homemade Cucumber Relish, Emma Macdonald had the simple idea that full-flavored, quality chutneys and preserves needed to be brought to the specialty sector. In The BayTree Home Deli Recipes she reveals all her deli-ingredient making secrets and shows you how to create delicious meals from them.

 
Bay Tree Home Deli Recipes

“These days, staying in is the new going out, and homemade deli is the way to eat gourmet!”

The Bay Tree Home Deli Recipes by Emma Macdonald

224 pages • Illustrated • £20.00

AUS $32.99 NZ $42.00

£20 l Buy the book now with free UK postage! 


Pad Thai recipe for a raw food diet

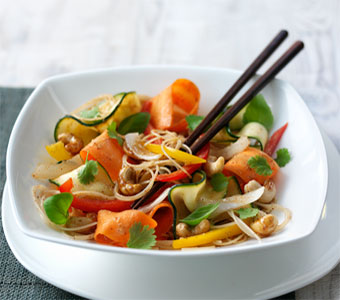
Christine Bailey's raw food diet, pad thai recipe
 
Looking for a quick and healthy dinner? Look no further than this Pad Thai recipe from Christine Bailey, which could be the perfect start to a revolutionary raw food diet.

You can prepare this dish in advance, if you want, but toss in the dressing only just before serving. Adding kelp noodles provides additional texture and minerals, which will support metabolism. Creamy, yet light and nourishing, this is the perfect start to a raw food diet.

What is a raw food diet? If you’re stuck in a diet rut, it could be the incredibly healthy way to lose weight that you’ve been looking for.

Health benefits

Almond butter is a fantastic, protein-packed spread, rich in vitamin E, fibre and antioxidants. It is a great source of healthy monounsaturated fats, plus the minerals magnesium, potassium, manganese and copper. Almonds can lower LDL cholesterol and stabilize blood sugar levels.
 

Pad Thai with Nut Dressing Recipe

Serves: 2

Soaking time: 15 minutes

Preparation time: 15 minutes

Storage: will keep in the fridge for up to 2 days

 
2 carrots, peeled and julienned
1 courgette, julienned
½ red pepper, deseeded and thinly sliced
½ yellow pepper, deseeded and thinly sliced
1 large handful kelp noodles (soaked for 15 minutes, then drained)
30g/1oz/½ cup unsweetened, dried, shredded coconut flakes
3 tbsp cashew nuts
handful of mung beans (optional)
1 small handful Thai basil leaves
1 small handful coriander leaves (optional)

For the Nut Dressing:

3 tbsp almond butter
1 tbsp lemon juice
1 tsp xylitol or yacon syrup
2 tbsp tamari soy sauce
2 tbsp melted coconut butter
1 tsp ground cumin
pinch chilli powder or flakes
 

1 To make the nut dressing, place all the ingredients in a blender and blend to create a thick sauce, adding as much as you need of 80ml/2½fl oz/⅓ cup water.

2 Place all the salad ingredients and noodles in a large bowl and stir in the dressing. Serve and enjoy!

 
Nutritional analysis per serving: Calories 469kcal • Protein 11.2g • Carbohydrates 18.8g • Fat 40.3g (of which saturates 15.9g)


This delicious Pad Thai recipe could form part of a raw food diet – here’s just a few reasons why a raw food diet is the healthy and happy way to lose weight (hint, one of the reasons is you still get to have dessert).

Christine Bailey, M.Sc, is a nutritionist, food and health consultant, chef, cookery teacher and author of the Raw Food Diet.


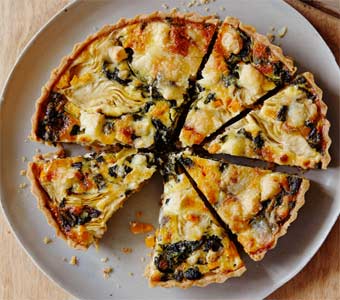
Goats’ Cheese and Summer Vegetable Quiche Recipe

daniel galmiche's recipe for a summer vegetable quiche with goats cheese

daniel_galmiche-author-of-French-Brasserie-CookbookThis quiche says summer to me – the warmth and sun of the Mediterranean – with its colourful mix of artichokes and red chard and aromatic lemon thyme. Not forgetting the crumbly goats’ cheese, which, when cooked slowly, adds an almost almondy flavour to the quiche. Try serving it alongside a red chard salad and pickled shallots – they really bring out the flavour of the summer vegetables in the quiche.
This recipe is taken from the égalité chapter of my new book, Revolutionary French Cooking. Égalité is a lovely word, and it would be great to drift away into all sorts of discussions and explanations – but that’s not for now. The focus of this chapter is to talk about ingredients that were originally perceived as peasant fodder, but are now being rediscovered and enjoying new recognition. To make democratic recipes that elevate humble ingredients to starring roles!

Underpin that with beautifully complementary ingredients. I’ve tried to create recipes in which the relationship between two, or sometimes more, ingredients, when combined with one another, make a perfectly balanced pairing – they are just great for each other. So you see, in that brief description, what we have captured in égalité.

Humble goats’ cheese, summer vegetables and herbs combined in a quiche represent égalité, and most importantly they make a delicious light meal.
 

Goats’ Cheese and Summer Vegetable Quiche Recipe

Serves: 4
Preparation time: 20 minutes, plus making the pastry and vinegar and 30 minutes chilling
Cooking time: 1 hour
 
15g/½oz unsalted butter, plus extra for greasing
250g/9oz Savoury Short Pastry
plain flour, for dusting
200ml/7fl oz/scant 1 cup double cream
100g/3½oz soft goats’ cheese log, such as Golden Cross or Ste Maure, rind removed, crumbled
2 lemon thyme sprigs
2 tbsp olive oil
1 onion, finely chopped
75g/2½oz drained bottled artichokes, thinly sliced
75g/2½oz carrot, peeled and finely diced
50g/1¾oz red chard leaves
25g/1oz watercress leaves
2 eggs, lightly beaten
¼ tsp freshly grated nutmeg
sea salt and freshly ground black pepper
 
1. Lightly grease a 20cm/8in loose-bottomed tart tin. Roll out the pastry on a lightly floured work surface until 25cm/10in diameter x 3mm/¹∕8in thick and use to line the base and the sides of the tart tin, pressing it into the edges without overstretching the dough. Trim any excess pastry, prick the base with a fork and chill for 30 minutes to prevent the pastry shrinking during baking.

2. Meanwhile, make the filling. Pour the cream into a saucepan, add two-thirds of the goats’ cheese and the lemon thyme and warm over a low heat for 3–5 minutes, whisking until smooth and silky. Remove from the heat and leave to cool while you make the rest of the filling.

3. Heat a non-stick frying pan over a medium heat. Add the butter, oil and onion and fry for 5 minutes, stirring occasionally, until softened but not browned. Add the artichokes and carrot, mix well and cook for 5 minutes until softened, then add the red chard and watercress and cook for a further 2 minutes until wilted. Tip out onto kitchen paper and press dry.

4. Add the eggs and nutmeg to the cooled cream mixture, season with salt and pepper, then whisk to combine.

5. Preheat the oven to 170°C/325°F/gas 3. Line the pastry case with baking paper and cover with baking beans. Put the tart tin on a baking sheet and bake for 12 minutes, then remove the paper and baking beans and turn the oven up to 180°C/350°F/gas 4. Brush the base of the pastry case with the reduced balsamic vinegar. Spoon the vegetable mixture over the base of the pastry case and sprinkle with the remaining goats’ cheese. Pour in the egg mixture and bake for 35 minutes, or until firm to the touch. Serve warm or at room temperature.


Make proper Cornish pasties this St. George’s Day

make-cornish-pasties-this-st-georges-day

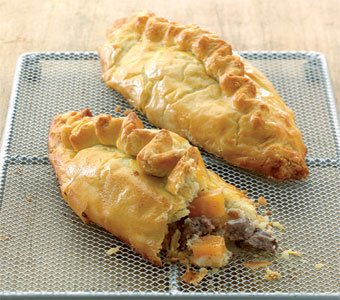
To celebrate St. George’s Day, try these traditional cornish pasty recipe from Roz Denny – serve with a cup of tea.

Cornish Pasty Recipe

500g (1lb 2oz) Shortcrust pastry
1 small onion, finely chopped
250g (9oz) chopped swede, turnip or carrot
400g (14oz) lean braising steak (skirt or chuck), diced small
500g (1lb 2oz) potatoes, finely sliced
1 egg yolk, beaten with 1 tsp cold water
sea salt and freshly ground white pepper


1. Divide the pastry into 4 rounds. Roll each of these into circles, about 23cm (9in), and cut out using a small dinner plate as a template.

2. Lay one on a board and arrange a quarter of the onion and swede down the centre. Top with a quarter of the diced meat, season well and top with a quarter of the potato. Season again.

3. Dampen the edges with water and gather two sides of the pastry together, pressing firmly to seal. Crimp by folding the pastry over in waves and tuck the ends in to seal. Place on a non-stick baking sheet.

4. Repeat with the remaining pastry and filling. Chill and rest for 20 minutes while you preheat the oven to 200°C (400°F, Gas Mark 6). Glaze the pasties evenly and make a small nick in each for a steam hole. Bake for 15 minutes, then reduce the temperature to 160°C (325°F, Gas Mark 3) and cook a further 25–30 minutes. Remove and cool for 20 minutes before eating, although they do keep warm for a long time.


7 reasons NOT to try Laughter Yoga

7-reasons-not-to-try-laughter-yoga

Did you know laughter is perhaps the most enjoyable exercise you can do? Lesley Lyle shows us 7 reasons NOT to try laughter yoga

‘At one time or another, most of us have tried to improve our health. We may have started a diet or exercise programme to improve our physical health, or some kind of psychological intervention to improve our mood and thought processes. If so, we probably soon realised that positive change requires sustained effort over time.

So when you hear about Laughter Yoga, an exercise that is simple, easy and (wait for it!) enjoyable, it can be difficult not to feel rather sceptical. For instance sceptics know –
 
1. You need to select an appropriate exercise for the benefit you want to achieve.

True, you can find many separate exercises that will increase your physical, emotional, social and psychological health but Laughter Yoga has a positive effect on ALL of these!
 
2. You have to have discipline and ‘make’ yourself stick to a new regime.

Think back to the last time you had a really good laugh – how did you feel? People look forward to a Laughter Yoga session because it’s great fun and easy to do. Time flies when you are laughing and most people don’t want to stop.
 
3. With any exercise, ‘practice makes perfect’.

Everyone knows how to laugh and so everyone starts out as an expert. A Laughter Yoga Leader simply facilitates your laughing experience. Laughter Yoga is suitable for every age from young to old.
 
4. It takes a while before you get results.

You can feel the benefits of Laughter Yoga within a few minutes. Increased oxygen and blood flow gives an energy boost and ‘happy chemicals’ increase positive mood and this effect can be felt for several days afterwards
 
5. Starting a new exercise regime can be expensive.

There is no special equipment of clothing required and everyone in the family can join in (it’s an especially lovely experience to share laughter with your loved ones). Laughter Yoga is often offered for free or with a small fee to cover costs of venue hire.
 
6. Not everyone wants to do yoga.

The term ‘yoga’ in Laughter Yoga refers to the yoga type of breathing, ‘Pranayama’, in which the exhaled breath is longer than the inhaled breath. There are no yogic type poses, and no knowledge of yoga is required.
 
7. Laughter Yoga sounds like an ‘alternative’ or ‘off-the-wall’ idea.

Laughter Yoga may sound odd, but its origin is soundly based in the scientific evidence that shows that there are many therapeutic benefits from laughter. Including improvements to the cardiovascular and immune system and general wellbeing.

Usually, when something appears to be, ‘too good to be true’, it turns out that it is too good to be true, but laughter appears to be the exception. There is a reason why babies spontaneously start laughing at a few months old and continue to laugh throughout their childhood. For many reasons most adults laugh infrequently and only when there is a reason. Science has shown that any sort of laughter, including laughter as an exercise, can invoke the healthy physiological response with its many benefits. Laughter truly is ‘the best medicine’ and Laughter Yoga is the simplest way to ensure that it is guaranteed. Many sceptics have tried Laughter Yoga and found, that despite their reservations, it really does work ☺’

So what’s stopping you from trying laughter? Here’s Lesley’s 6 ways to improve your day with laughter


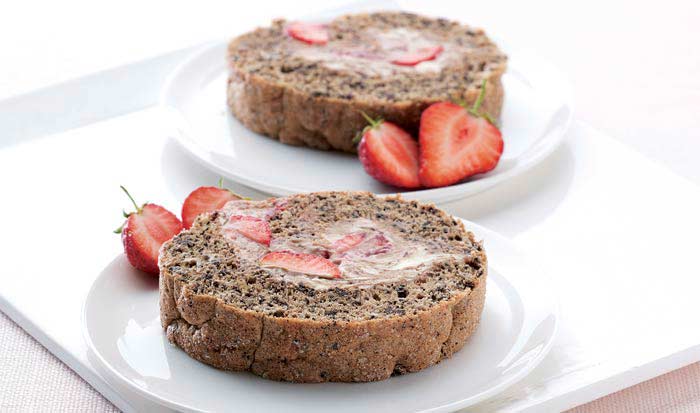
Chocolate cream roll with strawberries

chocolate-and-strawberry-swiss-roll
 

How big is your Easter egg haul? Probably too big to eat all by yourself (not without feeling just a bit guilty at least!) It would be a shame to let all that chocolate go to waste though, so why not melt down those surplus eggs and chocolate bunnies into pure chocolate, and make this family-sized dessert?

And if you’ve already eaten all your eggs, you can still make this – it is Easter after all. This recipe comes from Chocolate by Jennifer Donovan, the ultimate collection of chocolate recipes.
 

Chocolate cream roll with strawberries

Makes 1 x cream roll

Preparation time: 35 minutes 

Cooking time: 10–12 minutes 
 

butter, for greasing
4 eggs, separated
200g/7oz/¾ cup plus 2 tbsp caster sugar, plus 2 tbsp for sprinkling
75g/2¾oz dark or milk chocolate, grated
75g/2¾oz/½ cup plus 1 tbsp self-raising flour
150g/5½oz/1 cup strawberries, hulled and sliced
 

To make the Chocolate Chantilly Cream

250ml/9fl oz/1 cup double cream
2 tbsp icing sugar
100g/3½oz dark or milk chocolate, melted and left to cool

1 In a large bowl, whip the cream and icing sugar together to form soft peaks, using an electric hand mixer.

2 Gently fold in the melted chocolate until just combined, before using.
 

To make the Chocolate Cream roll

1 Preheat the oven to 180˚C/350˚F/gas 4. Grease a 33 x 23cm/13 x 9in Swiss roll tin with butter, and line the base and sides with baking paper.

2 In a large bowl, beat the egg yolks and half the sugar together until thick and creamy, using an electric hand mixer. Stir in 2 tbsp water, the grated chocolate and flour, using a wooden spoon. In a clean bowl, whisk the egg whites to soft peaks, using clean attachments for the electric hand mixer, then continue whisking, gradually adding the remaining sugar, until thick and shiny. Fold into the chocolate mixture until just combined, using a metal spoon. Pour the mixture into the prepared tin and spread evenly, using a palette knife.

3 Bake in the hot oven for 10–12 minutes, or until just firm. Remove from the oven and turn out on to a large sheet of baking paper that has been sprinkled with sugar. Remove the lining paper, then, using the baking paper to help you, roll up from a short side, enclosing the paper in the cake. Leave to cool completely.

4 When cool, unroll the cake carefully, spread with the chocolate Chantilly cream and scatter over the strawberries. Re-roll, transfer to a serving plate and refrigerate until ready to serve.


A chocolate recipe book

And if Easter hasn’t given you your chocolate fix, try Jennifer Donovan’s book Chocolate. This comprehensive book explains all you need to know about chocolate. It guides the home cook through a range of delicious chocolate recipes, from fabulous home-made cakes, brownies, ice creams, puddings and muffins to spectacular desserts and handmade chocolates. Some of them will be familiar favourites, while others will provide some new and exciting ways to use chocolate.
 
£14.99 l Buy the book now with free postage in the UK!


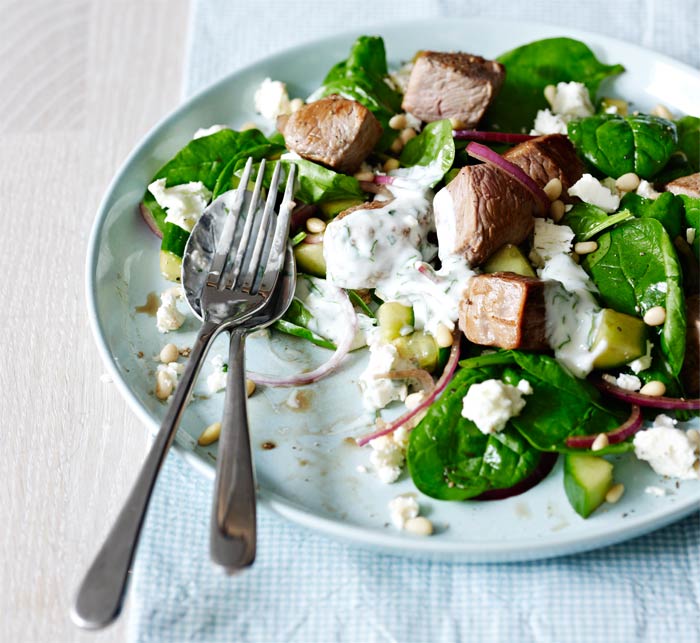
Low-carb Lamb & Feta Salad with Coriander Yogurt Dressing

Laura Lamont's low-carb lamb salad
 
Make the most of any left-over lamb with this delicious low-carb recipe from Laura Lamont. If you using what’s left of your Easter roast, make sure the lamb is thoroughly re-heated through before you add it to the salad.

‘This fresh and colourful recipe always reminds me of holidaying in Turkey, but I have added my own special twist to this Middle Eastern dish, using coriander instead of the traditional mint.’
 

Low-carb Lamb & Feta Salad

Serves: 2

Preparation time: 15 minutes

Cooking time: 5 minutes

300g/10½oz lamb fillet, cut into
chunks
2 handfuls of baby spinach leaves
½ red onion, thinly sliced
½ cucumber, chopped
1 tbsp balsamic vinegar
80g/2¾oz feta cheese
2 tbsp pine nuts
freshly ground black pepper
 

For the coriander yogurt dressing

1½ tbsp natural yogurt
1 tbsp finely chopped coriander leaves
½ garlic clove, crushed
1 tsp lemon juice
 

1 Heat a non-stick frying pan over a medium heat, add the lamb and cook for about 3 minutes, turning regularly and adding a drop of water, if necessary, to prevent the meat from sticking.

2 Put the spinach, onion, cucumber and balsamic vinegar in a non-metallic bowl. Crumble in the feta and mix well to coat the salad in the vinegar.

3 To make the dressing, put the yogurt in a small, non-metallic bowl and mix in the coriander, garlic and lemon juice.

4 Top the salad with the lamb pieces, sprinkle with the pine nuts and season with pepper, then serve with a dollop of the dressing.

Nutrition notes per serving: Calories: 375kcals | Fat: 23g | Carbohydrates: 15g
 
Looking for low-carb breakfasts? Try these 3 recipes to start your day the low-carb way!


If you’re looking for a new approach to healthy eating and weight loss, nutritional therapist Laura Lamont’s The New Low-Carb Diet is the effective long-term answer.

New Low Carb Diet recipes

“Groundbreaking recipes for healthy, long-term weight loss”

The New Low-Carb Diet by Laura Lamont
 

Find out more, and get free postage on all UK orders


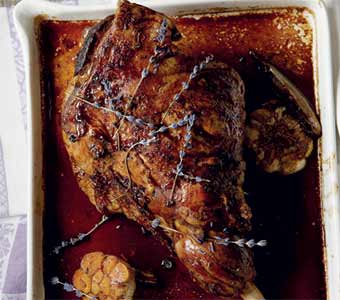
Roast Leg of Lamb with Garlic and Lavender

daniel galmiche recipe for roast lamb with lavender
 

This Easter, try something different with Daniel Galmiche’s gives an innovative twist on a classic
 
daniel_galmiche-author-of-French-Brasserie-Cookbook Rosemary and thyme are classic flavours to match with lamb, but lots of other herbs also go well with it. Personally, I find lavender wonderful. There are just two things to remember: measure it carefully (as too much can make your food bitter) and only use the flowers, not the stalks. A few years ago, while on holiday in Provence, we were walking to town to get some baguettes and pains au chocolat for breakfast when we found ourselves amid a sea of lavender fields. The colour and aroma were truly magical. On the way back we picked huge bunches of it. Some we tied together to take home and dry, and some I decided to put in the pot … this is what I made.


Roast Leg of Lamb with Garlic and Lavender

Preparation time: 25 minutes, plus overnight marinating

Cooking time: 1 hour 10 minutes

1.5kg/3lb 5oz leg of lamb
1 garlic bulb, unpeeled and halved horizontally
8 lavender sprigs, flower heads only
150ml/5fl oz/scant ²⁄ ³ cup olive oil
6 garlic cloves, peeled and halved
2 shallots, unpeeled and halved
sea salt and freshly ground black pepper 1 recipe

You need to prepare this dish the day before you want to eat it. Put the lamb in a cling film-lined roasting tin that fits in the fridge and season with black pepper. (Don’t season with salt now, as it draws the blood out of the lamb. Salt is always added just before cooking meat.) Add the garlic bulb and 6 heads of the lavender and pour 90ml/3fl oz/generous 1⁄3 cup of the oil over the top. Rub the seasonings in thoroughly, then wrap the lamb in the cling film and leave in the fridge overnight.

Preheat the oven to 200°C/400°F/gas 6. Unwrap the lamb, put it back in the roasting tin with the garlic bulb and dab it with kitchen towel. Pierce it several times with a sharp knife and push a halved garlic clove inside each opening. Add the shallots to the pan, pour the remaining oil over the top, season with salt and pepper and then roast in the preheated oven for 1 hour until golden brown on the outside but still pink and moist inside. Remove the lamb from the tin and wrap it in foil to keep warm.

Put 100ml/31⁄2fl oz/scant 1⁄2 cup water in the roasting tin to deglaze, then return it to the oven and cook for 3–4 minutes until reduced. This will gather all the flavours from the caramelization of the meat and give you the concentrated juice you need. Unwrap the lamb. You will find some juice has also gathered in the foil – add it to the juice in the roasting tin, stir and set aside.

Slice the lamb, then drizzle it with the juice, sprinkle with the remaining lavender flowers and serve with sautéed potatoes.

Chef’s tip: While lavender is a stunning match with the lamb, this dish can be made with more traditional herbs, such as rosemary and thyme, or any other herbs of your choice, to create your personal twist to this dish.


‘Daniel Galmiche creates easy, modern food that is full of flavour and character’ Heston Blumenthal


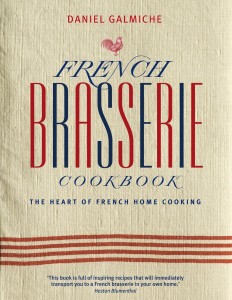
French Brasserie Cookbook: The Heart of French Home Cooking

Daniel Galmiche

Order your copy now with free UK postage!


Home