menu.png

Ingredient Spotlight/ Gluten Free Flour

This article is an extract from The Best Gluten-Free and Dairy-Free Baking Recipes by Grace Cheetham.

Look around the free-from section of a health-food store or a large supermarket and you’ll find a large variety of gluten-free and dairy-free products. Food manufacturers are continually producing fantastic ingredients – all of which make it easier and easier to cook wonderful free-from food.

Flour Mixes
For baking, it’s a good idea to start with a selection of flours. I’ve created different flour mixes for different types of recipes, depending on the texture and amount of crunchiness or softness needed. In the Basic Recipes chapter, you’ll find different mixes for Flaky Pastry, Shortcrust Pastry, Sweet Shortcrust Pastry, Bread, Cakes and Biscuits. The pastry and bread mixes use sturdy flour combinations, so that they hold together well, whereas the Cake Mix produces a soft, moist texture, and the Biscuit Mix a crunchy one.
I’ve used brown rice flour in all of the mixes as it is a great base flour. It has a lovely taste and holds really well. When the mix needs a stronger flour base, I’ve used a combination of gram (chickpea) flour and maize flour. These are both great in terms of holding together and, while the gram flour has quite a strong taste, when it’s combined with maize flour that has a subtle, slightly sweet taste, it works really well. (For those who had stopped using gram flour because of the taste – trust me!).
It’s important to create a balance of grain flours and starch flours, depending on the type of recipe. The flours I’ve just mentioned are all grain flours. Starch flours work slightly differently, in that they tend to lighten the mix and give rise to the baking. For starches, I’ve generally used cornflour because it’s inexpensive and easy to find, has a very bland taste and gives a fantastic consistency. For bread, though, I’ve added potato flour as it helps create a moist, tender crumb texture, as well as a better rise.
I’ve added ground almonds to the Sweet Shortcrust Pastry – to make it sweeter, and help hold the pastry together – and to the Biscuit Mix, as it gives biscuits the crunchiness when baked.

I find the best thing to do is to make up large batches of the flour mixes and store them in my cupboard. Depending on the size(s) of your containers, you can make up double or triple quantities, if you’re planning to use a lot of the mix. (But bear in mind that the mix won’t keep forever.) Then it’s just a question of measuring out the required amount for the recipe you are about to make – and off you go…

Alternative Flours
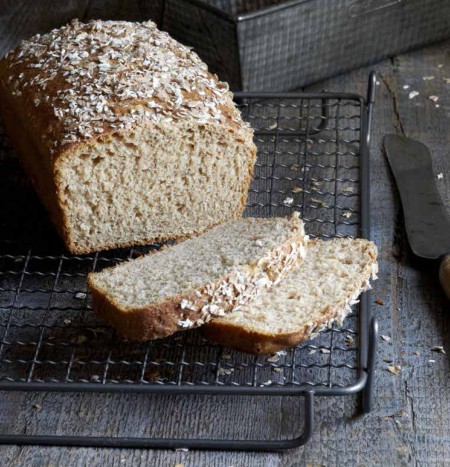
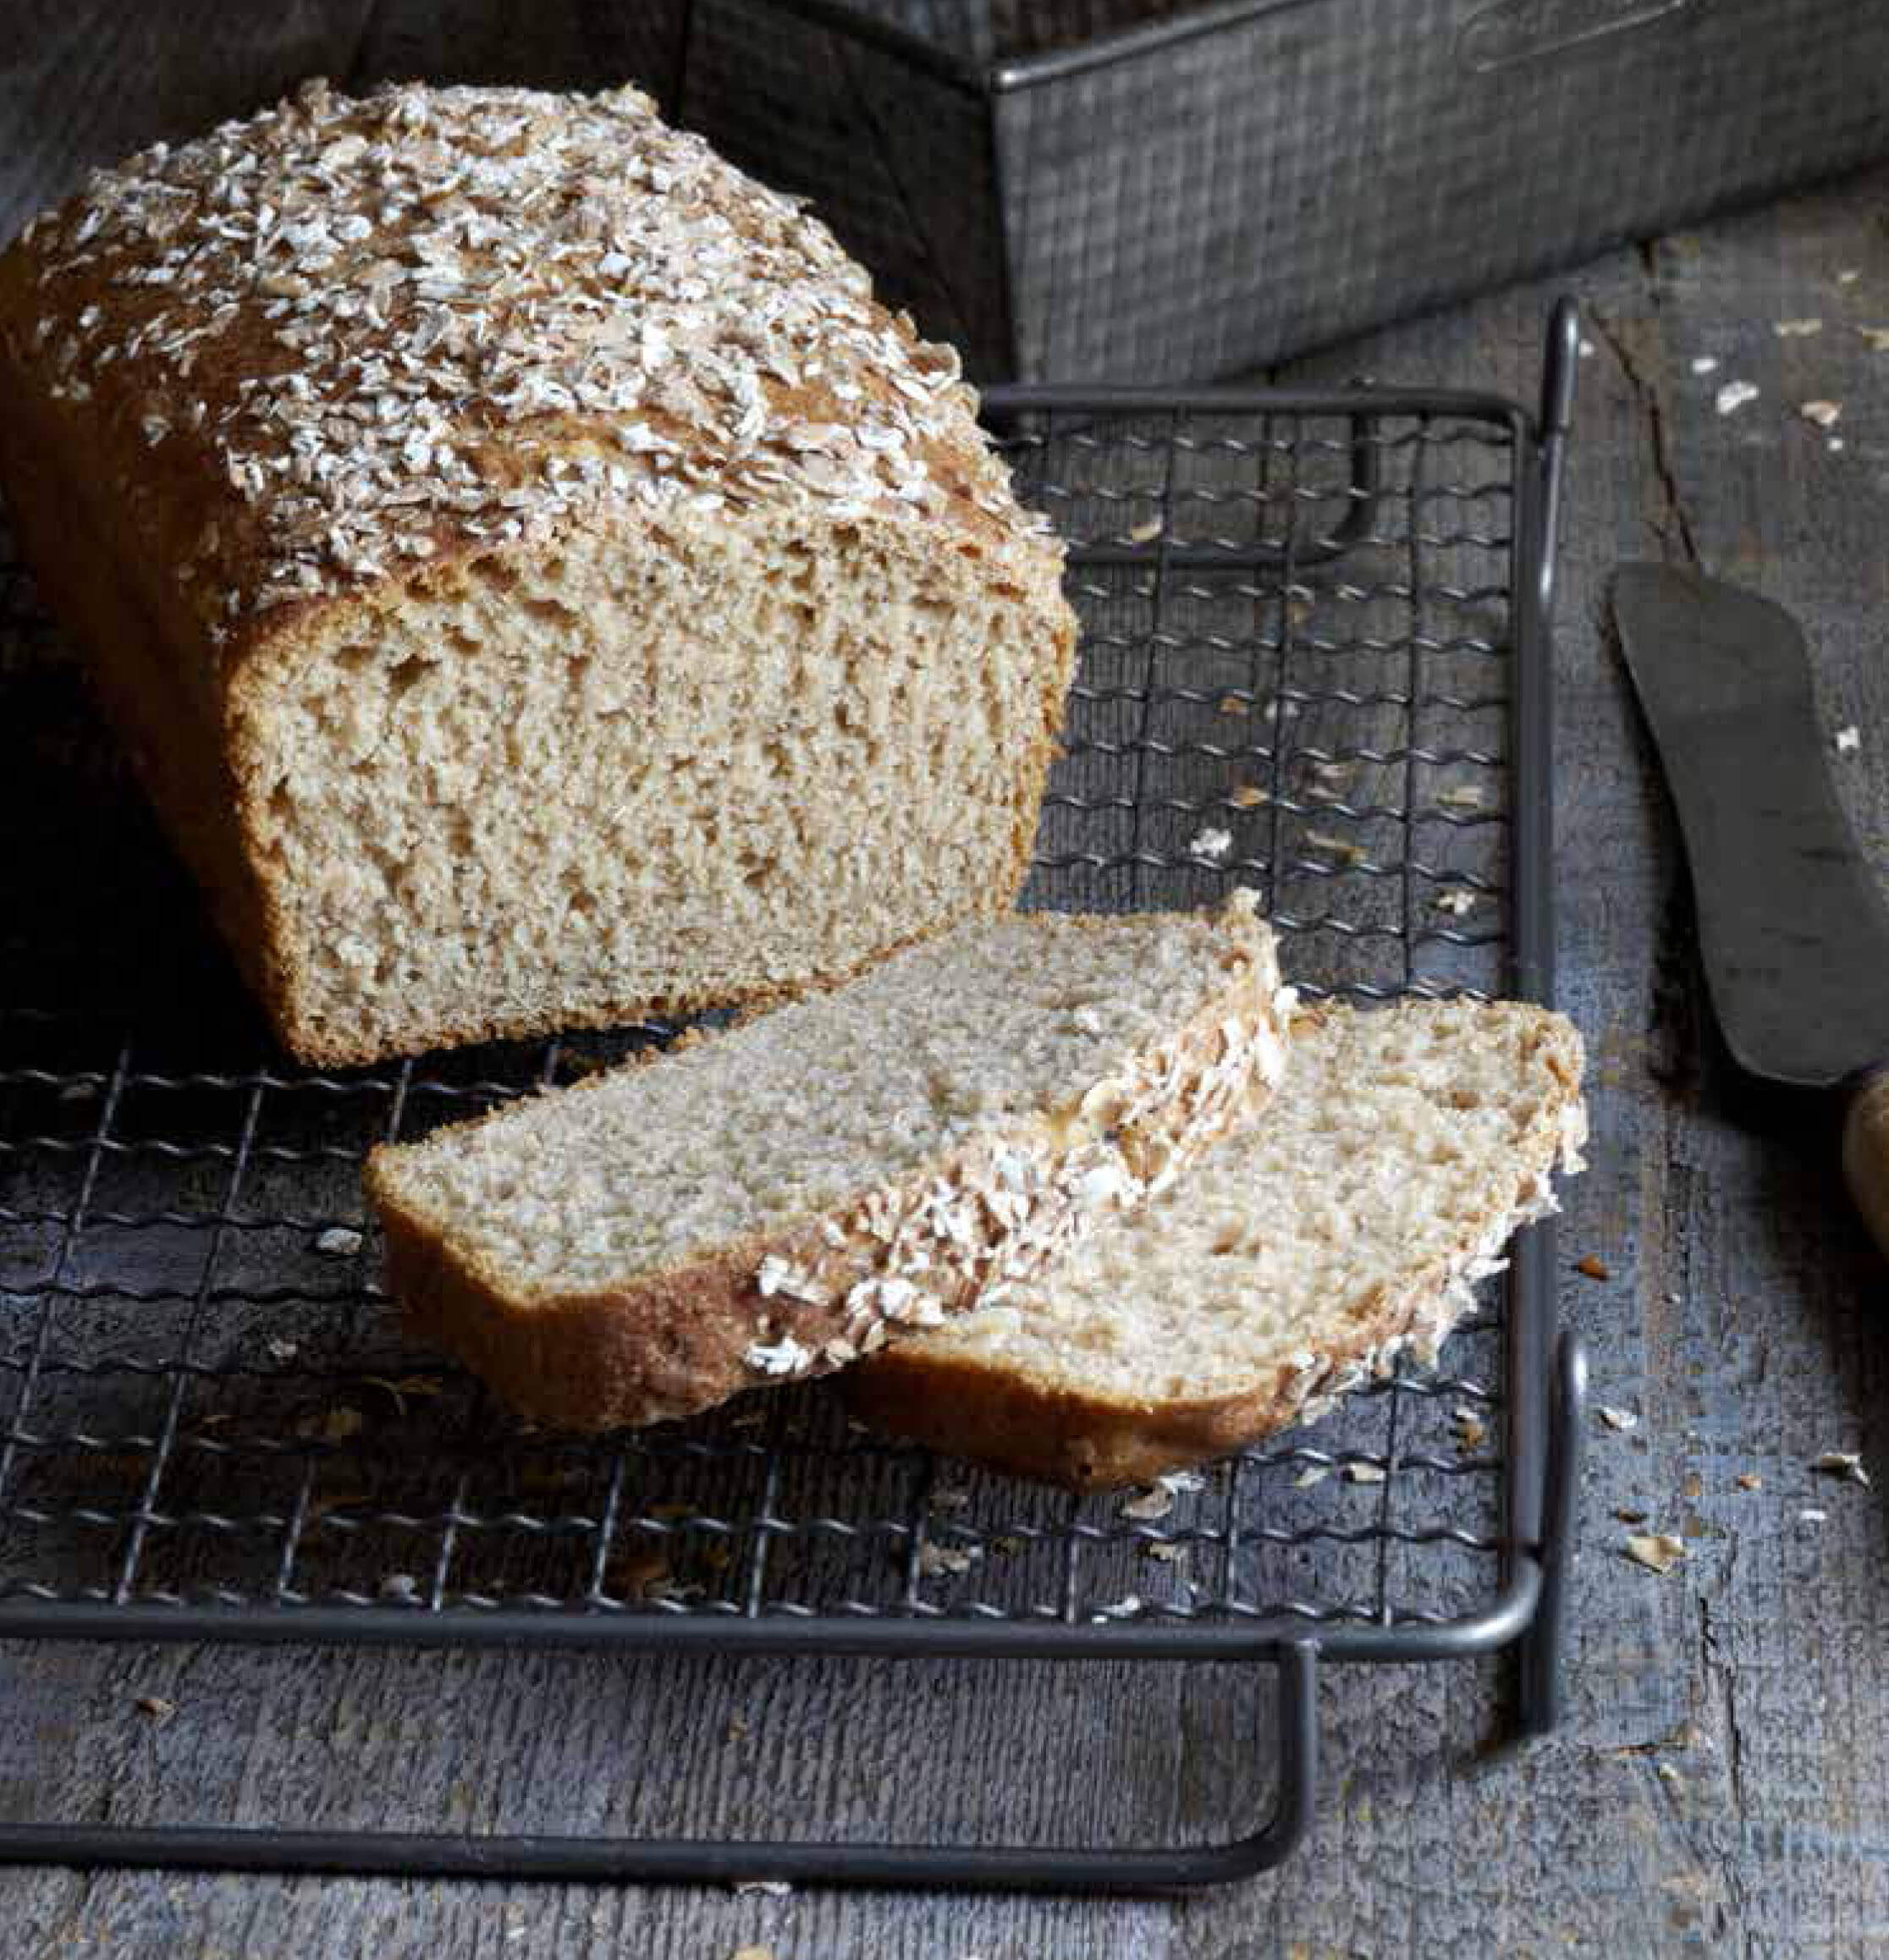
I’ve used a couple of alternative flours within the recipes themselves. In the Oat & Molasses Bread, I’ve added gluten-free oats, to add a sweetness and strong texture. Gluten-free oats are a brilliant ingredient, and it’s easy to make them into a flour by blending them in a food processor. For the Corn Tortillas, I’ve used masa harina, as this finely milled version of maize flour is the only one that works for tortillas. And for the Paleo Bread (grain-free bread), I’ve used coconut flour. Coconut flour is incredibly nutritious, is very filling as it is high in fibre, protein and (good) fat, and is grain-free. It works fantastically well as a flour, although you need to use less of it (a third to half of the recipe quantity and possibly more liquid) because it soaks up more liquid than other flours). But it is expensive – which is why I haven’t used it throughout the book.
There are many other flours that you can use as alternatives, but I wanted to keep the list of ingredients as simple and accessible as possible, and because I think these mixes work the best. Other flours commonly used are buckwheat, millet, teff, quinoa and soya. Other starches available are tapioca and white rice flour. Personally, I find the taste of buckwheat flour too strong, and it is a very heavy flour so it doesn’t rise well. Millet tends to be bitter, teff has a strong taste, too, and it is expensive and hard to get hold of. Quinoa flour also has a very strong taste, although if you can mask the flavour, it is extremely nutritious. Soya flour is probably my least favourite flour as it doesn’t hold well or give a good rise, or taste particularly good. I’m also not keen on tapioca starch as I find it gives a metallic aftertaste, and I know many people are intolerant to it.
But all of these options at least give you that – the option to change the ingredients that you’re using if you decide you prefer another one, or if you need to expand your ingredients list (perhaps if you’re following a rotation diet). If you decide to alter any of the mixes, you can simply substitute a similar flour in the same quantities as those in the mix.

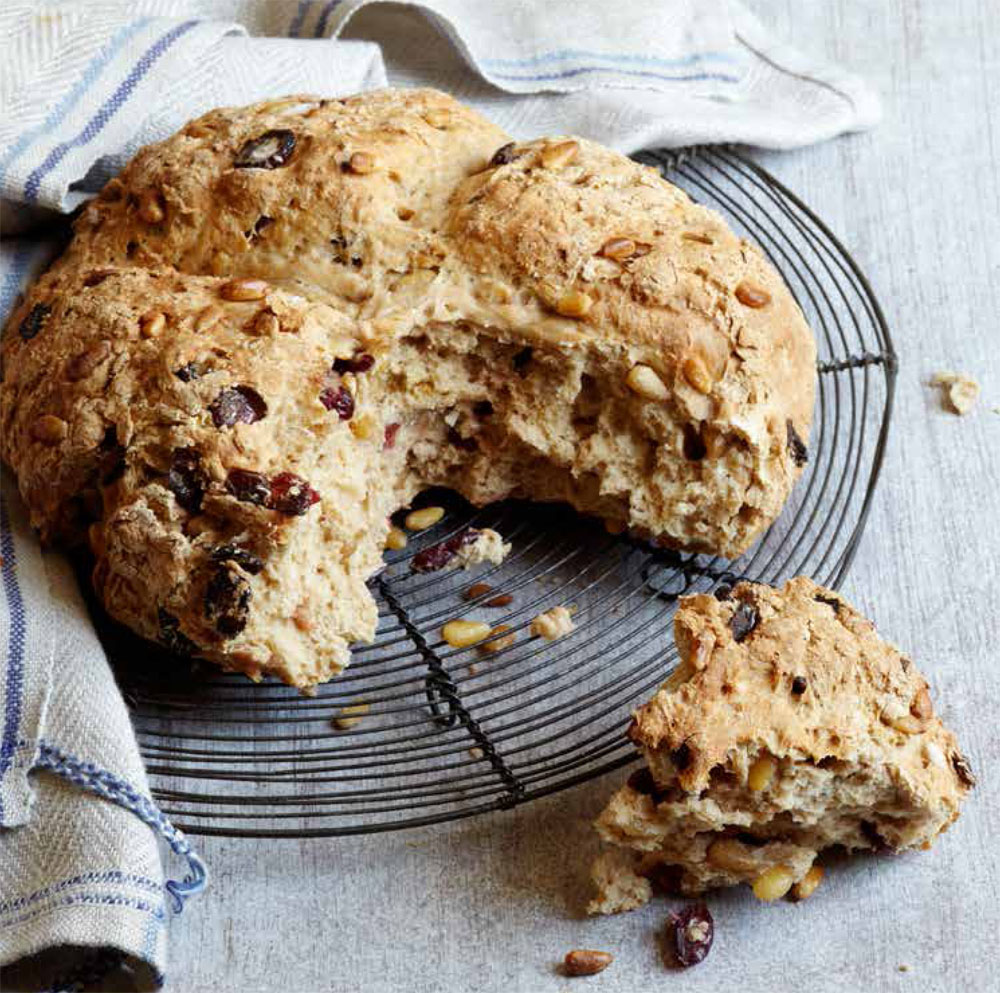
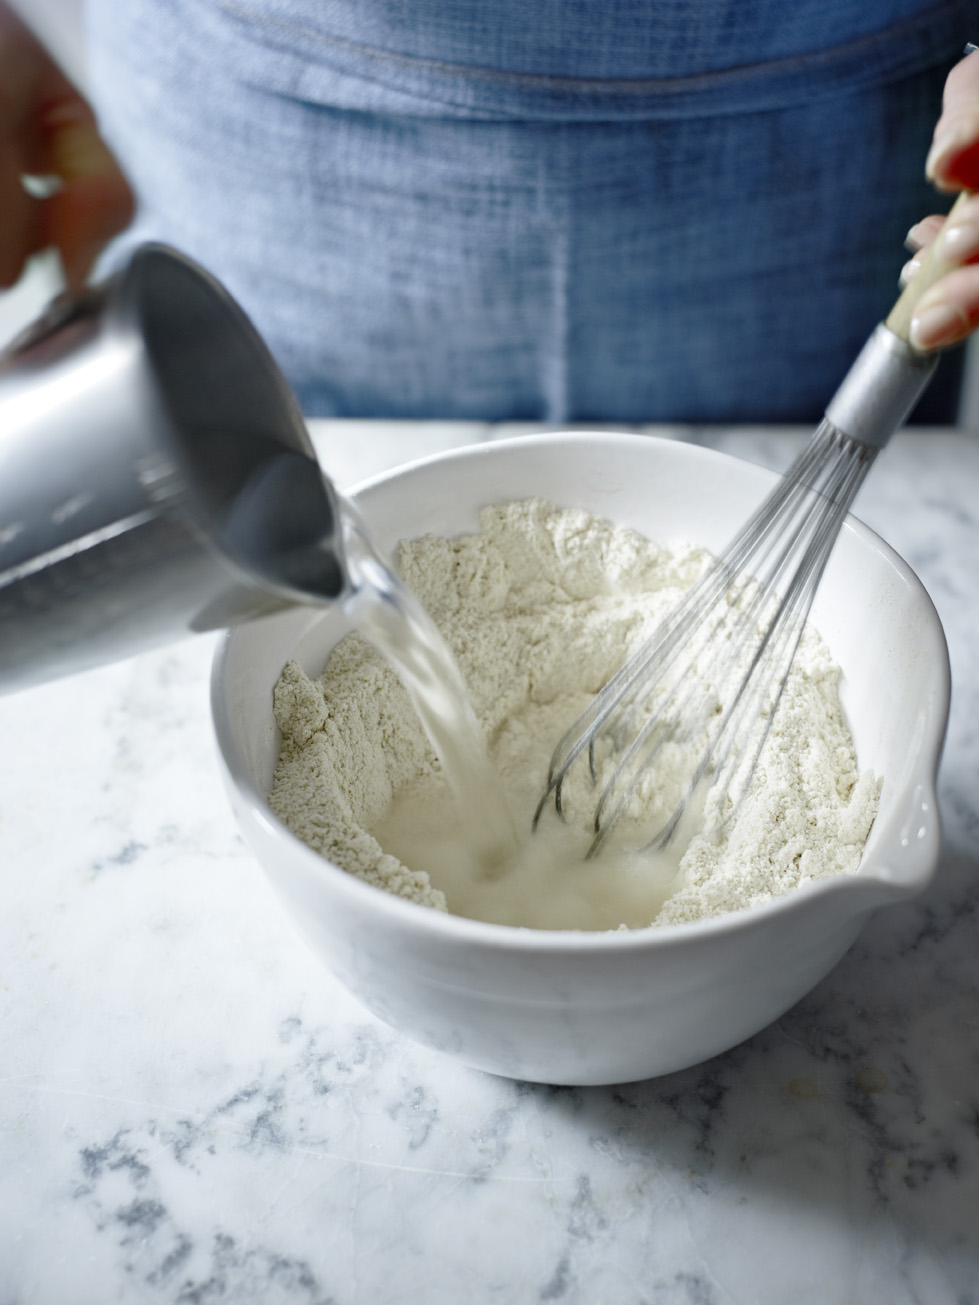
The beauty of making gluten-free bread is that you often don’t have to knead, knock back or leave to prove. You can usually mix the ingredients together, whisk in some water – and bake immediately.

Bread Mix
150g/5½oz/heaped ¾ cup brown rice flour; 60g/2¼oz/⅓ cup potato flour; 60g/2¼oz/½ cup cornflour; 50g/1¾oz/scant ½ cup gram (chickpea) flour; 50g/1¾oz/⅓ cup maize flour; 1 tsp xanthan gum

1. Sift the flours and xanthan gum into a large mixing bowl and mix together.

Olive & Rosemary Focaccia1-Olive & Rosemary Focaccia-1

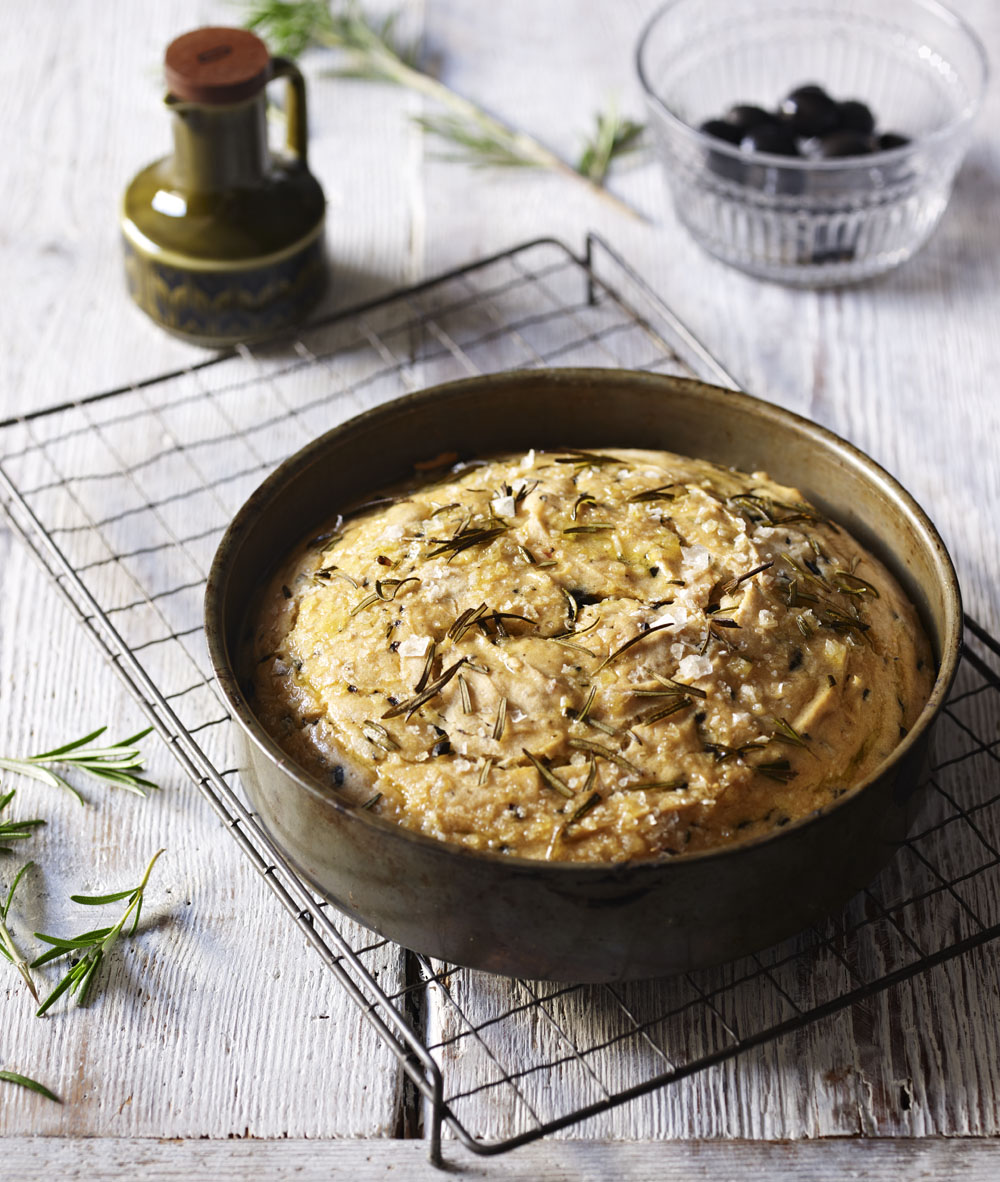
4 tbsp olive oil, plus extra for greasing; 370g/13oz/2¾ cups Bread Mix ; ½ tsp salt; 1 tbsp dried active yeast; 100g/3½oz/heaped ½ cup good-quality black olives, pitted and chopped; 1 handful of rosemary leaves, chopped, plus extra for sprinkling; sea salt, for sprinkling1 tbsp dried active yeast

1. Preheat the oven to 200°C/400°F/gas 6 and lightly grease a 20cm/8in round cake tin with olive oil.

2. Put the bread mix, salt and yeast in a large mixing bowl and mix together thoroughly. Add the olives, half of the rosemary and
3 tablespoons of the oil and mix in. Pour in 375ml/13fl oz/1½ cups warm water and, using a metal whisk, beat vigorously for 1–2 minutes to aerate the dough. Beat until the dough holds some shape, but is still soft enough to fall from the whisk, adding 1 or 2 extra tablespoons of warm water if it feels too stiff.

3. Spoon the dough into the prepared tin and level the surface with the back of a metal spoon. Wash the spoon clean and dip it in cold water, then smooth the surface of the dough with the back of the wet spoon, repeating to cover the whole area. Drizzle the remaining oil over the top, then sprinkle with rosemary and salt.

4. Bake for 45–50 minutes, or until the bread is golden brown and sounds hollow when turned out of the tin and tapped on the base. Transfer to a wire rack and leave to cool.

1005_original-300x413

Grace Cheetham
The Best Gluten-Free and Dairy-Free Baking Recipes
Available from Nourish Books

Meet Renee McGregor

Renee McGregor Bsc(hons)RD PGCERT(sportsnutr) is a registered dietitian and sports nutritionist. Accreditedimage by the Health professions Council and a member of SDUK – Sports Dietitians UK, Renee has over 10 years expertise and knowledge in nutrition, including experience working with elite athletes and their coaches; she is a regular contributor to BBC Food, Cycling Plus, Trail Running Magazine, Runner’s world Magazines. Renee has now just finished her first book – Training Food, which every athlete needs to fuel their training!

Can you describe your book? What should the reader expect from it?
The book is a journey really – a complete guide to sports nutrition. The first section takes you through the science and importance of sports nutrition; how your body works and how you feed it appropriately, looking at individual components of the diet as well as de bunking myths around fad diets and tackling the subject of sports supplements.
The middle section of the book looks at individual sports but also the types of training you might do within these sports and how you tailor your nutrition accordingly. There are meal plan, practical tips and case studies.
The next section highlights the importance of getting the balance right between nutrition and training and how to spot potential problems and risks of injury.
The final section includes the recipes ranging from breakfasts to desserts. All the recipes are quick and easy to follow with no special ingredients and suitable for the whole family.

What sport do you practice?
My main sports is running, generally trail running from half marathon distance all the way up to ultra-marathon distance. The longest distance I have covered to date is 50 miles around the Gower Peninsula along the coastal path. I also do a lot of yoga.

What are your goals and intentions as a writer?
My main goals and intentions are to write informatively, making science simple and accessible to all. I am passionate about ensuring everything is evidence based, even if that sometimes means its not what individuals want to hear!

You work as a nutritionist. What are the biggest challenges in your job?
My job is very diverse which I love; within the same day I could be working with junior athletes all the way to athletes on the elite pathway. The main aim of my role is to ensure that each athlete regardless of their background meets there performance goals. For some this will be about getting stronger; for others it will be getting faster or returning from illness and injury.
My main challenge are the constant messages in the media which often don’t have any real evidence behind them and are usually being presented by individuals who are not qualified to give out nutritional information.

What is the ingredient that is absolutely necessary in training food?
Probably Greek yoghurt!

Do you have a favourite recipe?
I have 2 – the Blueberry birchers muesli and the 3 lentil dhal with coriander and chilli. But it seems that the most popular recipe by far are The Sweet potato Brownies!

What is your next project?
I’m not sure t the moment – there are a few options; I have been considering going back to study more but I’m also still really enjoying working with athletes especially in the lead up to Rio. I wouldn’t be opposed to writing more books either!

training-foodRenee McGregor
Training Food
ISBN: 9781848992665
£10.99


Sign up for our newsletter to get our new articles straight to your inbox every month.

Breakfast Ideas to Get Started With the Hunger Type Diet

– by Lowri Turner

The Hunger Type Diet starts with getting your breakfast right. By this I mean eating the best food to get all your Hunger Type hormones working properly. And yet this is probably the meal that most people get wrong. How? You’re busy, so you grab a couple of slices of toast with jam, or a muffin or a croissant, or you just attach a jump-lead to your brain, aka glug down a strong coffee. But all of these are bound to unbalance your Hunger Type hormones and set off a tsunami of cravings that last for the rest of the day.

Peanut Butter and Blueberry Smoothierecipe
Many dieters are frightened of peanut butter, because the calorie content is so high. There’s no doubt that if you spread it on toast like tile adhesive you’ll put on the pounds, but it’s full of healthy fats and a little goes a long way, as in this smoothie.
Serves: 2
Preparation time: 5 minutes
Ingredients: ¾ cup rolled oats; 2 tablespoonss sugar-free smooth peanut butter; 2 cups blueberries; ½ cup vanilla flavor whey protein powder; 4 tablespoons fat-free Greek yogurt; 1¾ cups skim milk; 2 tablespoons flaxseed

1 Put all the ingredients in a blender or food processor and add 1¼ cups water, then blend until smooth. Serve immediately.

Quinoa Crunch Bars
For those who haven’t heard of quinoa, it’s a grain used all across Central and South America. Higher in protein than rice or wheat, it makes these
bars better at keeping your blood sugar and hunger hormones stable.
Makes: 6
Preparation time: 10 minutes
Baking time: 20 minutes, plus cooling
Ingredients: 1½ cups quinoa flakes; ½ cup rolled oats; ¹/D cup stevia-based granulated sweetener; 2 tablespoons ground flaxseed; ½ cup chocolate flavor whey protein powder; 2 tablespoons cocoa powder; 1 tablespoon chopped hazelnuts scant ½ cup coconut oil, melted; 4 tablespoons agave syrup.

1 Preheat the oven to 375°F. Line a 12 × 9-inch baking pan with baking parchment. Put all the ingredients in a large bowl and stir well to combine, using a wooden spoon.
2 Tip the mixture into the prepared pan and use your hands to press it down evenly. Bake for 20 minutes or until golden brown. Remove from the pan and
leave on a wire rack to cool completely. Cut into 6 bars before serving.

Bran and Berry Muffins
Oat bran might look like the stuff with which you line a hamster’s cage, but it is fantastically high in fiber and low in calories. It bulks out these muffins so that they keep you satisfied until lunchtime.
Makes: 6
Preparation time: 10 minutes
Baking time: 25 minutes, plus cooling
Ingredients: Generous ¾ cup whole-wheat flour; 1 teaspoon baking powder; ½ teaspoon baking soda; ¹/D cup berry flavor whey protein powder; 1 tablespoon oat bran
¹/D cup stevia-based granulated sweetener; 2 eggs; Heaping ¹/D cup fat-free Greek yogurt; ½ cup canola oil; 2 teaspoons agave syrup; 1 teaspoon vanilla extract; ¾ cup fresh strawberries, hulled and finely chopped

1 Preheat the oven to 350°F. Line a muffin pan with six paper cases. Sift the flour, baking powder, baking soda and protein powder into a large bowl. Stir in the bran and sweetener.
2 In another bowl, beat the eggs with the yogurt, oil, agave syrup and vanilla extract, then pour this mixture into the dry ingredients. Add the strawberries and stir gently with a wooden spoon until just combined.
3 Fill the muffin cases and bake for 20–25 minutes until golden brown. Remove the muffins from the pan and leave on a wire rack to cool completely before serving.

HungerTypeDiet_PB_US_CMYK-300x463

Lowri Turner
The Hunger Type Diet
ISBN: 9781848999770
Available from Nourish Books

Sign up for our newsletter to get our new articles straight to your inbox every month.

Fuel Requirements for Running a Marathon

main image

– by Renee Mcgregor

Regardless of whether you are training for a 5K, 10K, half marathon, marathon or longer, your training plan will include a variety of training sessions spanning low-, medium- and high-intensity training. The number of each of these sessions will depend a little on the distance you are doing and how many days a week you want to train. When training for a marathon it is beneficial to do intervals, but they need to be longer, around 3–5 minutes. Short intervals work the anaerobic system whereas longer intervals use the aerobic system and it is this system that needs to be pushed so that you can start to improve your lactate threshold. By improving your lactate threshold you will be able to run at a faster pace for a longer period of time before the build-up of lactate becomes limiting to your performance.

For a marathon you will include ‘steady state runs’. Marathon runners have a race pace set 20–30 seconds below their threshold pace. Remember your lactate threshold is the pace you can hold for 30–60 minutes (the better trained you are, the longer you will be able to hold this lactate threshold) before the acidity levels become too high in the muscle and you need to stop or slow down. A marathon is going to take longer than an hour, which is why the race pace for a marathon is set slightly slower than your lactate threshold. These ‘steady state’ moderate-intensity runs will be 30–40 seconds below your race pace and 60 seconds slower than your threshold pace. This pace will feel controlled with some effort but should not feel hard.

Fuel requirements
This session is harder than an easy run but you are still running within your comfort zone. Your daily carbohydrate requirement will be a maximum of 5g/kg BW and your protein requirement will be 0.25g/kg BW four times a day. The moderate-intensity sample menu plans in Chapter 2 demonstrate what these requirements look like practically and also take into account the time of day you do your run.

If you are an experienced runner, you may feel confident doing this moderate-intensity session early in the morning in a fasted state but do ensure you are hydrated and keep the session to a maximum of 60 minutes. If, however, this session is going to be 60–90 minutes or is scheduled for the day after a hard training session, you will need to have some fuel before your run. Some good examples include:

Banana

1–2 pieces of malt loaf

1 piece of toast

Small pot of fat-free Greek yogurt with 1–2 tsp honey

Take time to think about your recovery needs after your run . Aim for 1g/kg BW carbohydrate and 0.25g/kg BW protein and also bear in mind the time frame.

If this is your only training session for the day, aim to eat your recovery meal or snack within two hours of completing your run. For most of you this will fall at your next meal. For example, you go out for a steady state run before breakfast at 6.30am and return at 7.30am. You are not planning to do any further training today. The key is to have a good recovery breakfast option, such as Blueberry Bircher Muesli or Scrambled Egg Pitta by 9.30am.

It’s your choice if you want to have this as you walk back through the door or if you would prefer to have a shower first! If you are planning to do a second training session within the next 12 hours and your next meal is not imminent after this run, you will need a recovery choice within 30 minutes followed by a meal two hours later.

Blueberry Bircher Muesli
This is one of my all-time favourite breakfasts, especially in the summer months after an easy early morning run with my spaniel, Bailey. The complex carbohydrate from the oats combined with the high protein from the Greek yogurt mean that this breakfast provides me with slow-release energy all the way through to lunch.
Serves 1
Preparation time: 5 minutes, plus overnight soaking

For the Blueberry Compôte:
350g/12oz/2½ cups blueberries

For the Bircher Muesli:
85g/3oz Blueberry Compôte
30g /1oz/heaped ¼ cup rolled oats
170g/6oz/heaped ⅔ cup fat-free Greek yogurt
2 tsp clear honey

1 Put the blueberries in a saucepan with 4 tablespoons water over a medium heat. Bring to the boil, then turn the heat down to low and simmer for about 10 minutes until the blueberries are soft and slightly thickened.
2 Leave the compôte to cool, then transfer to a screw-topped jar and keep in the fridge for up to 3 days.
3 To make the Muesli, put a quarter of the Blueberry Compôte (85g/30z) in a bowl, stir in the oats, cover and leave to soak in the fridge overnight.
4 Stir in the yogurt and honey and enjoy.


training-food

Renee McGregor
Training Food
ISBN: 9781848992665
£10.99


Sign up for our newsletter to get our new articles straight to your inbox every month.


Best Spring Harvests to Turn into Drinks

-by Nick Moyle and Richard Hood

Spring, at long last, has started warming up the land, giving us longer days in the sun and set off some vigorous plant growth, meaning we’re able to head out into the garden and wild hedgerows in search of things to turn into booze. There may not be the wide choice of ingredients that summer and autumn provide, but there are still plenty of flavours available to make a varied array of drinks. Here are our five favourite spring harvests.

wineRhubarb
One of the first edible plants to announce itself on the allotment is rhubarb, a veg that tastes like no other and is adept at seeing off the coldest winters, coming back bigger and stronger every year. Rhubarb wine was one of the first drinks we made from a home grown harvest and our easy recipe has inspired many fellow allotmenteers to have their first dabble with a demijohn. Rhubarb is also a great ingredient for infusing in vodka and sweetened with sugar to make a delicious liqueur, either on its own or paired with other flavours such as orange or ginger. We’ve even found room for it in a home brewed beer, adding a slightly sour, fruity tang to a light, malty ale (don’t believe it works? Then try this). Such is our reverence for the rhubarb we’re currently growing six different varieties to see which one makes the best booze.

Nettles
If nettles didn’t have a habit of growing where they’re not wanted and blighting bare flesh with irritating stings, they would be considered a vegetable treasure. Used like spinach the leaves have a superbly healthy flavour making them a great free treat for the kitchen – nettle risotto is one of our favourites. A nettle harvest can also be used for numerous drinks, so it’s well worth stepping out with a pair of rubber gloves to grab a load. Nettle wine is said to be rather good, although we’ve yet to try this ourselves, instead opting to turn it into a light, refreshing beer. Leaves can be used to flavour regular ales as an alternative to hops, but our preference is for a nettle only concoction, quickly fermented along similar lines to traditional ginger beer and low in alcohol. It has a surprisingly zesty flavour, along with some earthier notes, that make it an ice cold treat to accompany the first barbeque of the year.

Dandelions
Anything nettles can do, dandelions would claim to do better. Also used as a hop substitute they provide a distinctive bitterness to ales and can be used solo for a beer Brew It Yourself Single Page Hi Res-69similar to that made by nettles – with leaves, roots and flowers all being plunged into the brewing pot. We like to give this particular brew a fruity overhaul by adding oranges, lemons and grapefruit to the recipe – a zesty delight that makes a spot of weeding all the more worthwhile. The sunny, yellow flowers of the dandelion can also be used to make another of our favourite country wines that, according to tradition, should be started on St George’s day. If you don’t mind getting yellow stained fingers then fill a bag with flowers and follow the simple recipe on our website.

Tree leaves
It may sound strange to the brew-it-yourself novice, but the young leaves of several trees can be used to flavour alcoholic beverages. Leaves tend to bring slightly nutty notes to drinks, enabling us to expand our flavour repertoire in new and unusual directions. So far we’ve had most success with leaves from the mighty oak, the ubiquitous beech and the harder to track down walnut (Nick is lucky enough to have a few ancient walnut trees growing in his neighbouring park). We’ve used both young and old oak leaves for wine – the older the leaf, the nuttier the flavour – and they make for an intoxicatingly quaffable drink. We soak our beech leaves in various spirits for some unique infusions and liqueurs – similar in style to a ‘noyeaux’, they’re great for delivering a nutty punch to cocktails. Walnut leaves are an ingredient in some ancient mead recipes, the heady wine-like tipple made from fermented honey, and give the finished drink a robust, herby flavour. We made a walnut leaf mead two years ago – it’s slow maturation means it should be ready for us to sample any time now.

Rosemary
Although available all year round, rosemary starts to put on rapid growth in spring, making it at its flavoursome best. Besides being an herby foil for roast lamb, it’s also a useful bittering ingredient in booze. It has found its way into many fortified wines, spirit infusions and cocktails but it’s beer we think it suits best. This month we’re crossing the county border from Somerset to Gloucestershire to collaborate with an exciting new brewery on our own rosemary and coriander beer, featuring herbs and hops grown in the garden. We’re hoping to hang on to enough bottles to see us through to summer.

Brew It Yourself Single Page Hi Res-7
Nick Moyle and Richard Hood

About the Authors: Nick Moyle and Richard Hood both grew up during the UK home-brew boom of the 1970s and 80s, with parents who regularly made their own drinks from home-grown produce, enlisting their help. This fired up a life-long obsession for the art of brewing and in 2008 they built their own cider press and have been producing cider for local pubs, beer festivals and deserving friends ever since. They started their Two Thirsty Gardeners website in 2012, which inspires thousands of loyal followers.


1002_original1-300x388

  Nick Moyle and Richard Hood
  Brew It Yourself
  ISBN: 9781848992276
  Available in July 2015

Sign up for our newsletter to get our new articles straight to your inbox every month.

Fact or Fiction on Caffeine

feat image caffeine

– by Renee Mcgregor

Some people can’t even think about stringing a sentence together before they have had their first shot of caffeine, while others will be reduced to a nervous wreck simply from inhaling coffee fumes.
So what is the deal with caffeine?
For years we were told to be wary of how many caffeinated drinks we consumed daily as they had diuretic properties, resulting in dehydration.
As science evolves, messages change and the truth is that a moderate consumption – 1–3 strong cups of coffee a day, 3–6 cups of tea or a can of coke – will have no negative effect on your health.
When it comes to sports nutrition, caffeine has its own part to play. It has been used by many elite athletes as a performance- enhancing substance, but as with everything, what works for one person doesn’t necessarily work for another.
Individuals are either caffeine responders or non-responders. If you are someone who can drink a cup of coffee late at night and still sleep like a baby, you are a non-responder. In other words, caffeine has no effect on you at all. If, however, the opposite is true and you will be up all night, tossing and turning, you are responder. Caffeine works best as a performance enhancer in those who are responders and the suggested dose is 1–3mg/kg bW about an hour before training/competing.
If you find that you respond strongly, I would suggest sticking to the lower limit of this value and definitely practise drinking this amount in training.
For non-responders there is some evidence to suggest that cutting caffeine out completely for 10 days and then re-introducing it before a competition can have more enhanced effects.
That said, you have to weigh up if the withdrawal symptoms are worth it or not!
My advice to athletes is that if you habitually drink caffeine then it is best not to change anything immediately before a competition.


training-food


Renee McGregor
Training Food
ISBN: 9781848992665
£10.99


Sign up for our newsletter to get our new articles straight to your inbox every month.

The Nutritional Values of Spelt

bread

Extract from Spelt by Roger Saul

Spelt is truly a wholegrain, in contrast to so many of the pretenders on the shelves these days. Unlike much wheat, where the nutritional benefits of bran and germ are largely removed during milling, the good stuff in spelt is found in the inner kernel of grain, and so survives the milling process unscathed. Few reasons why spelt makes people feel good:

1. It beats the bloat
It seems that sensitive digestive systems find spelt is more easily tolerated than those varieties of modern wheat that have been bred to contain a high gluten content for the production of high-volume baked goods. This could be because spelt has a more fragile gluten structure, which is easier to digest as it is more water soluble than modern wheat.

2. It’s high in fibre
Spelt’s high fibre content not only makes it easier to digest the gluten, but it is important for lowering cholesterol levels in the blood, too. In addition, foods with a high fibre content pass through the gut more quickly, and research shows that faster transit time is an important factor in bowel cancer prevention.

3. It provides slow-release energy
The structure of the long chain molecules in the spelt grain are important because they help your body digest the grain slowly. Spelt also has a lower GI (‘glycaemic index’: the effect that different foods have on blood glucose levels) than many grains. Many people are sensibly learning to avoid high-GI carbs found in refined foods, which cause glucose ‘spikes’ to hit your bloodstream and can lead to all kinds of health problems, including type-2 diabetes.

 4. It’s a natural vitamin and mineral source
Spelt grain is a good source of nutrients; it’s high in B vitamins, which help to break down and release energy from food, keep nerves and muscle tissue healthy as well
as aid skin, digestive system and eye health. It contains vitamin E, which helps to protect the cells from the damaging effects of free radicals. It is rich in the mineral magnesium, which is important for activating muscles and nerves and creating energy in the body. Spelt also contains potassium and iron. Potassium is vital to help nerves and muscles communicate, while iron provides oxygen to blood cells. Finally, it is rich in manganese, which plays an important role in the digestion and utilisation of food, normal bone structure and the functioning of the central nervous system.

5. It’s good for your heart, blood and bones
Spelt is an excellent source of phytoestrogens and lignans. Phytoestrogens are plant compounds that scientists believe may help blood cholesterol levels, blood vessel elasticity, bone metabolism and many other vital cellular metabolic processes.

6. It’s a healthy source of protein
The protein in the spelt we produce at Sharpham has historically made up between
11 and 15 per cent of the grain, depending on the growing season and weather conditions. These proteins contain all of the nine essential amino acids needed by the human body (called ‘essential’ because the body cannot manufacture them on its own).

7. It might even make you happier too!
Recently, scientists have confirmed what naturopaths have been suggesting for years
– that your gut ‘brain’, the enteric nervous system, is innately linked to your immune system, and that your digestive health can have a direct effect on your emotional state. Patients suffering from irritable bowel syndrome (IBS) or other digestive disorders can also suffer from anxiety and depression. I am a firm believer that keeping your tummy happy can help keep you happy, too, and as spelt can aid with digestion and bloating, it could be the perfect prescription.

Mary Thomas’ Pine Nut & Cranberry Soda Bread

image bread

Make 2
Preparation time: 20 minutes
Cooking time: 35 minutes

Ingredients: a little oil, for greasing; 675g/11⁄2lb/heaped 51⁄3 cups white; spelt flour, plus extra for dusting; 1⁄2 tsp sea salt; 1 tsp bicarbonate of soda; 1 handful of pine nuts; 1 handful of dried cranberries, or any dried fruit/seeds of your choice; 285ml/10fl oz/scant 11⁄4 cups buttermilk, plus extra if needed

Preheat the oven to 200°C/400°F/gas 6 and grease a large baking sheet.

Put all the dry ingredients in a large bowl and make a well in the centre. Add the buttermilk, then stir gently with a knife to bind the mixture together to a soft, scone-like consistency, stirring in a little more buttermilk, if needed.

Turn the dough out onto a lightly floured work surface, divide in half and gently shape into rounds. do not knead or the finished bread will be tough. Slice or press a cross in the top of each loaf, then put on the prepared baking sheet.

Bake for 35 minutes, or until a skewer inserted in the centre comes out clean. Transfer to a wire rack to cool.


9781848991965-300x390

Roger Saul
Spelt
ISBN: 9781848992290
£16.99


Sign up for our newsletter to get our new articles straight to your inbox every month.

Home